
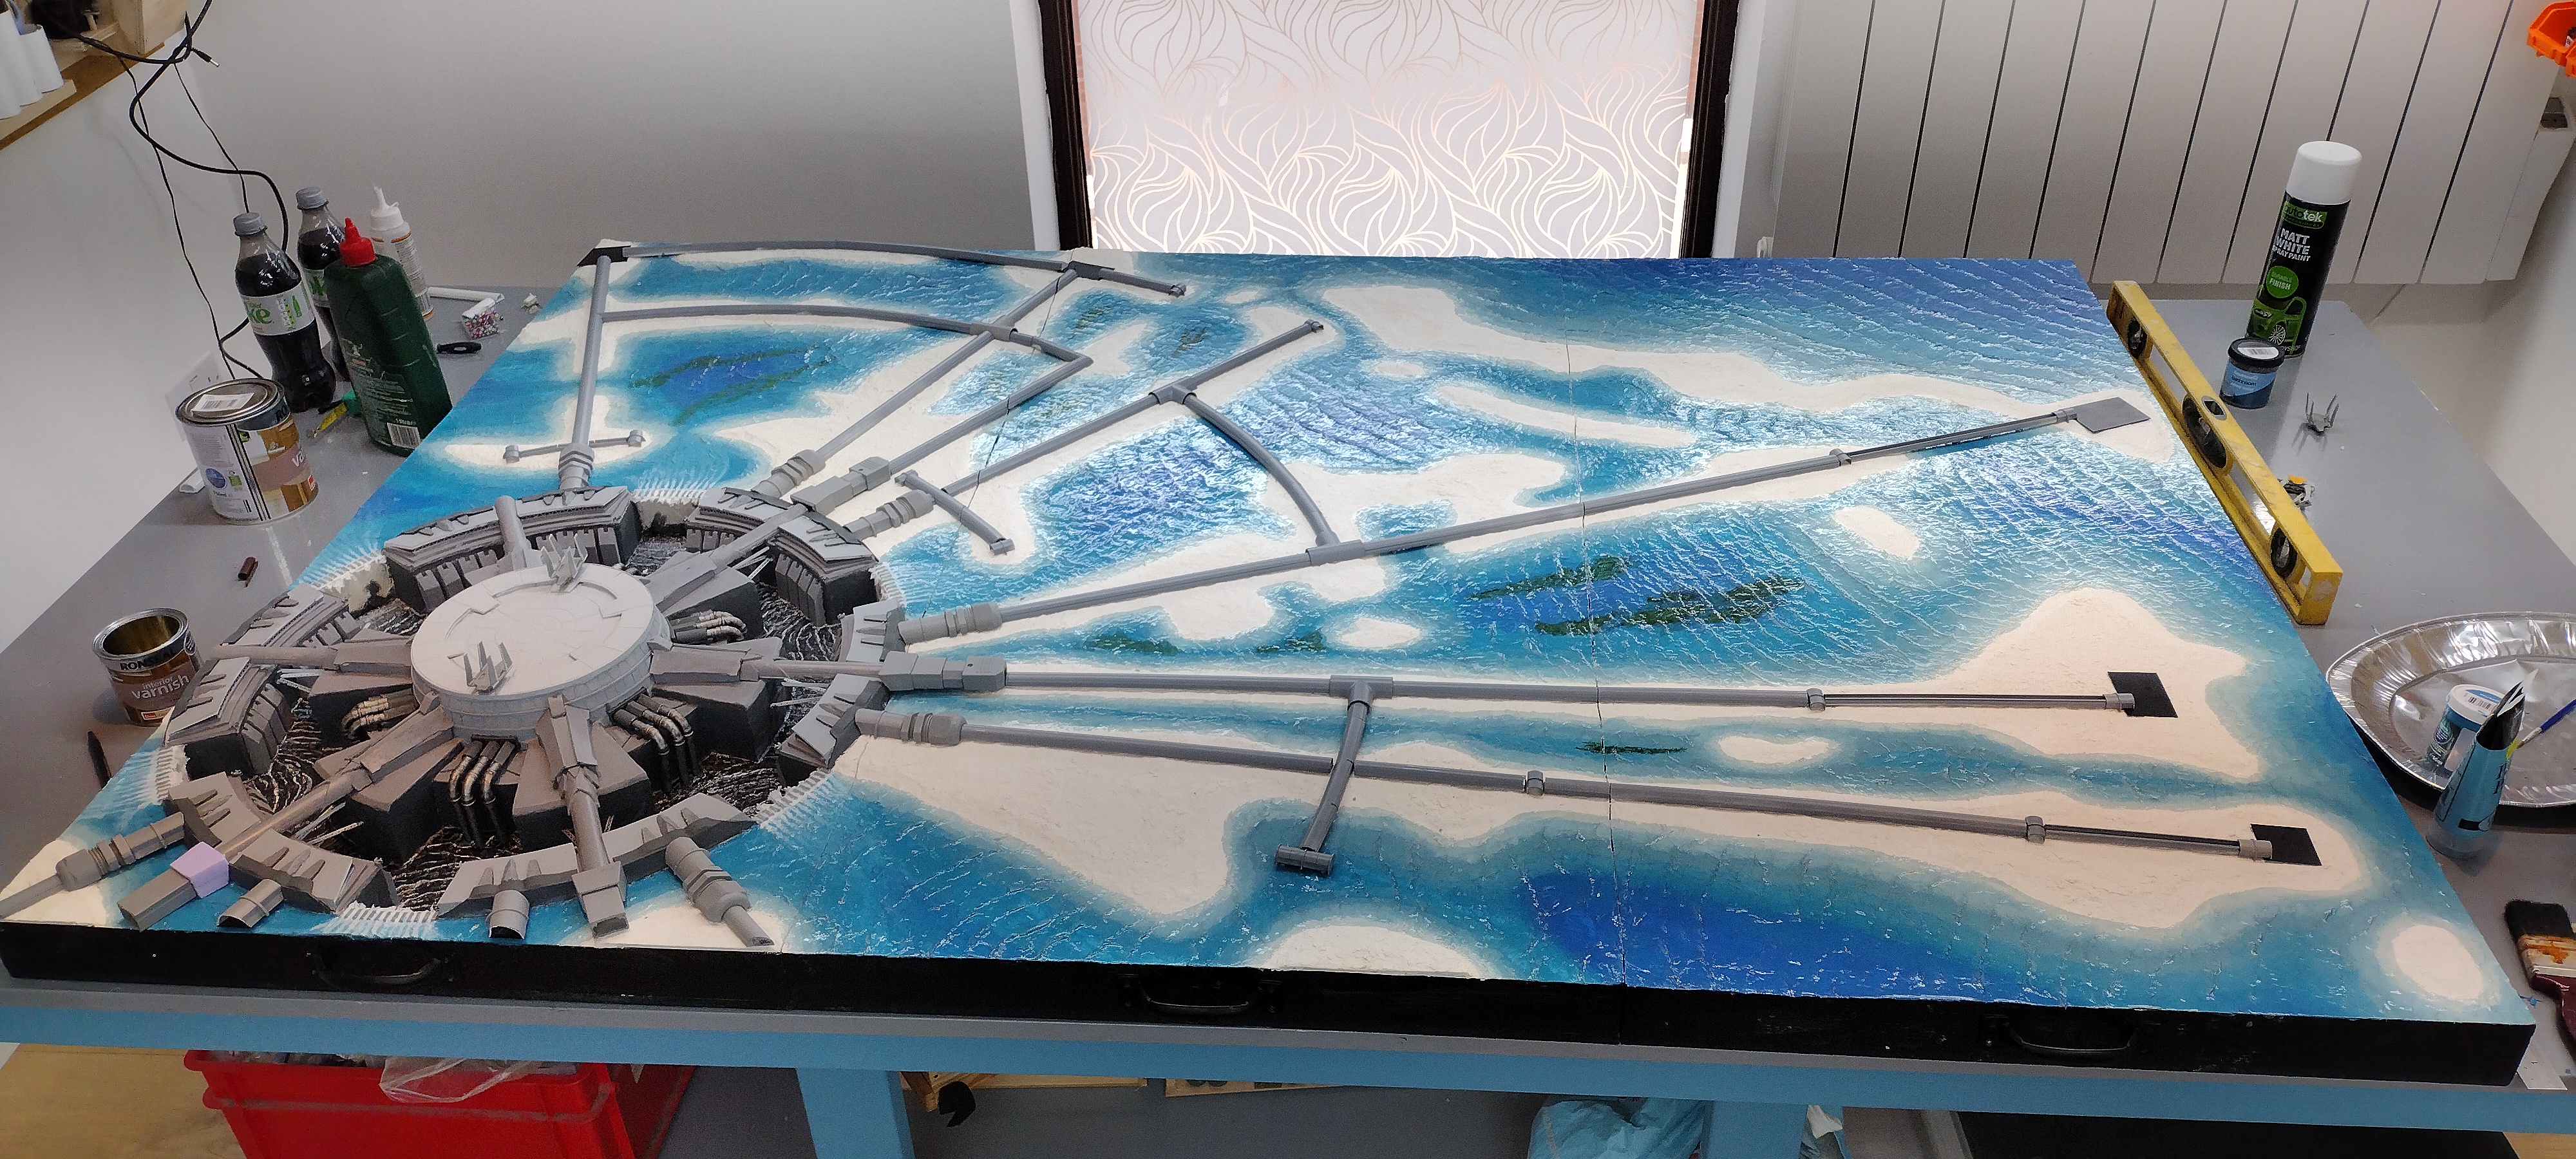
One of the key features of Scarif are the various transit lines that radiate out from the citadel tower. They draw the eye to the main tower, connect the various islands and tie it all together. So having created the islands and the seas I could now add the transit systems to the board.

The map really helped because it gave me a sense of the different elements - spur connectors, covered lines, open lines and a number of different junction and terminal structures. Then it was a case of looking through all the reference photos to get an approach for each piece. The next step was to determine the positioning of the lines and then the concentric rings. I had to adjust the location of the outer ring slightly to keep a section of it entirely on the board. I marked these all out with pencil on the board.

The transit lines I created using electrical mini trunking from my local DIY store. I experimented with various sizes but essentially went for the smallest ones because the islands are not very wide and I needed the space for figures to be able to fit on them. The first sections of line, as seen in the movie, are open at the top and seem to feature maglev pods.

For this I used the square trunking, 10mm wide and 8mm tall. It has one side that clips on, so I just removed it. The idea was to trim this piece and then insert it at the bottom of the trunking and use the ridges as the rails. The remainder of the lines I used D-line D shape trunking 16mm wide and 8mm high.

I added landing pads using small rectangles of plasticard cut to a rough size based off the map and placed on the board and edges tided up. The transit line pieces were all cut to a rough length and laid out on the board. In order to be able to use the trunking for the interconnecting rings I used a hacksaw and cut halfway through the trunking at regular intervals. I then bent the trunking evenly along its length until it conformed to the curve I needed. Using polyfiller and liquid green stuff I filled in the cuts and then sanded them smooth. Once painted they appeared smooth and like new.

Where the lines crossed over the sea I cut some styrene 3.2mm square rod and used these as support struts. I couldn’t see anything like a support in any of the photos from the movie but I needed them to help secure the trunking on to the board, particularly for the concentric rings.


The terminals were made from slightly oversized D-line junction end pieces. These were trimmed slightly and to make the overhang another doors I simply snipped a 1mm wide piece off the end of the half round trunking and glued it on.
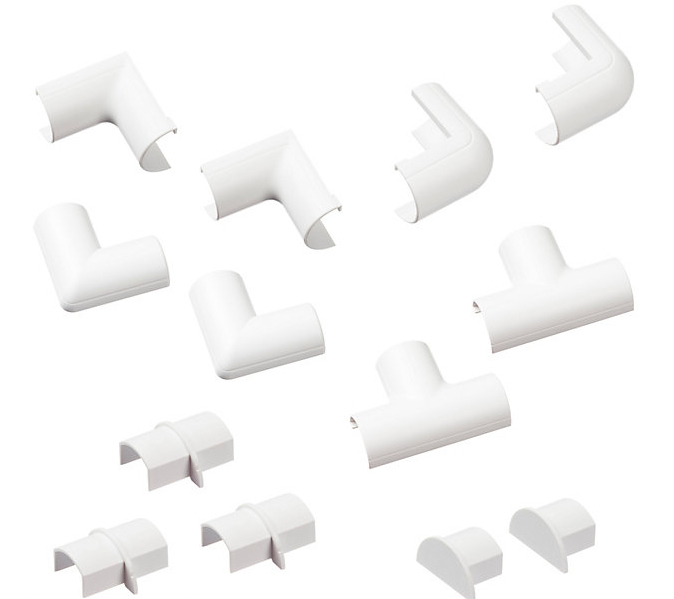

A number of other junctions were made using oversize trunking junctions, either 90 degree angle junctions or T junctions.

Movie stills also indicated that there were a number of triangular buildings seemingly situated at key points along the transit lines. These were created by placing a straight trunking joiner at right angle to the line and then cutting a triangular block from the pink foam. Using a modelling file I then filed a depression centred on the peak of the triangle until I had created a 3mm indent. I then created a topper in the shape of a cross from the 3mm styrene rod. Several other larger structures were visible in the stills and so these were simply approximated out of the pink foam.

The transit lines ending at the base of the tower had more intricate and larger sections. The lines tended to be in groups of 3, terminating adjacent to each other. However those joining separately seemed to mirror the line opposite it. There seemed to be two types of junction, a slightly larger more intricate one on both outsides of the three and a simpler one in the middle. The middle piece used an electrical junction box used when you cut through the power cable of an appliances by accident to get it working again and a flanged electric junction piece. The outer ones used a plastic cable gland waterproof compression connector with hexagonal nuts cut into halves lengthways and more oversize trunking connectors with a triangular piece of pink foam glued on top.

Once all the pieces were in place and glued firmly to the board I simply painted them a middle grey using the same painter test pots I’d used on the base. All very straightforward once I had figured out how I was going to approach it. Other little flourishes were added in a small number of places, such as the barracks and at cargo terminals using the same connectors slightly differently. As soon as this was done the shape of the board became significantly clearer and the size of these pieces determined the size of the trees and bushes I would use to complete the layout of the terrain.
Next time I will talk about how I laid out the grass, bushes and the various solutions I looked at for trees. Until then keep the dice rolling!
Charles the Modeller
