
Once I’d created the base of the citadel tower I could then begin to create the rest of the terrain for the board. This was essentially the islands that surround the tower and the seas that flowed between them. Once done this would allow me to see the outline of the final board and I could then begin planning the creation and placement of the transit system infrastructure. As usual I started with the map.

This build gave me an enormous amount of flexibility at this stage. It’s a made up map of a made up world and so accuracy was not a big concern and the islands are small and low so no need for complex contouring!
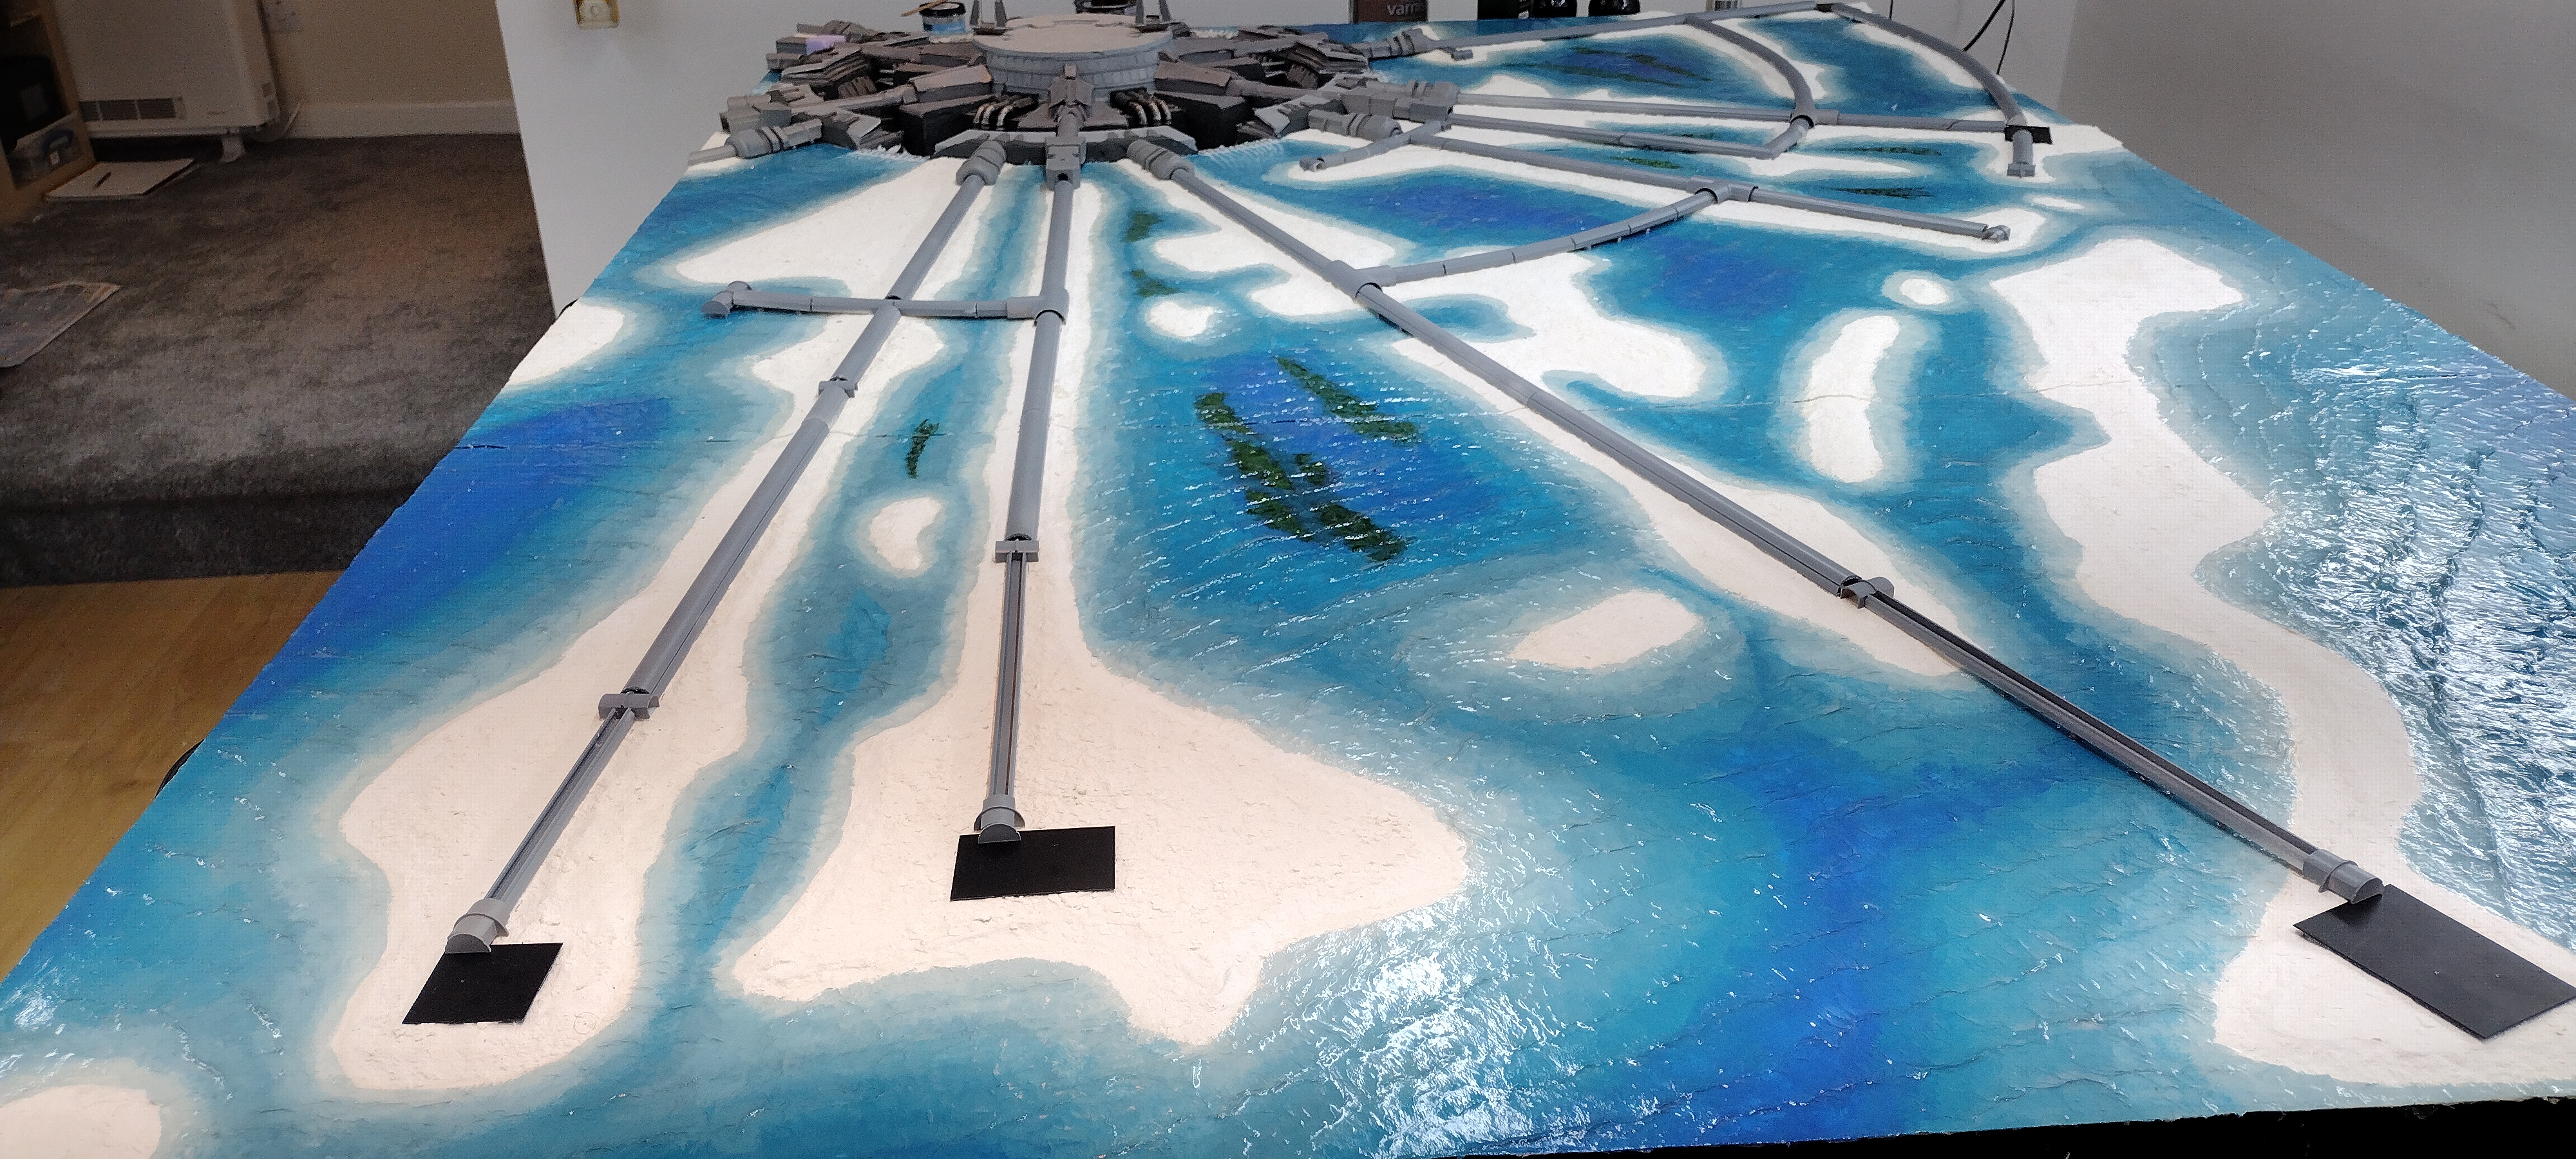
I had reduced the tower base so that it fitted neatly into a 60cm by 60cm section of a board. I decided to slightly increase the length of some of the island chains so that they took up almost all of the length of the board. As these islands would be where most of the action took place having more area made sense. I marked my boards with 30cm squares and then marked out the edges of each island onto it.
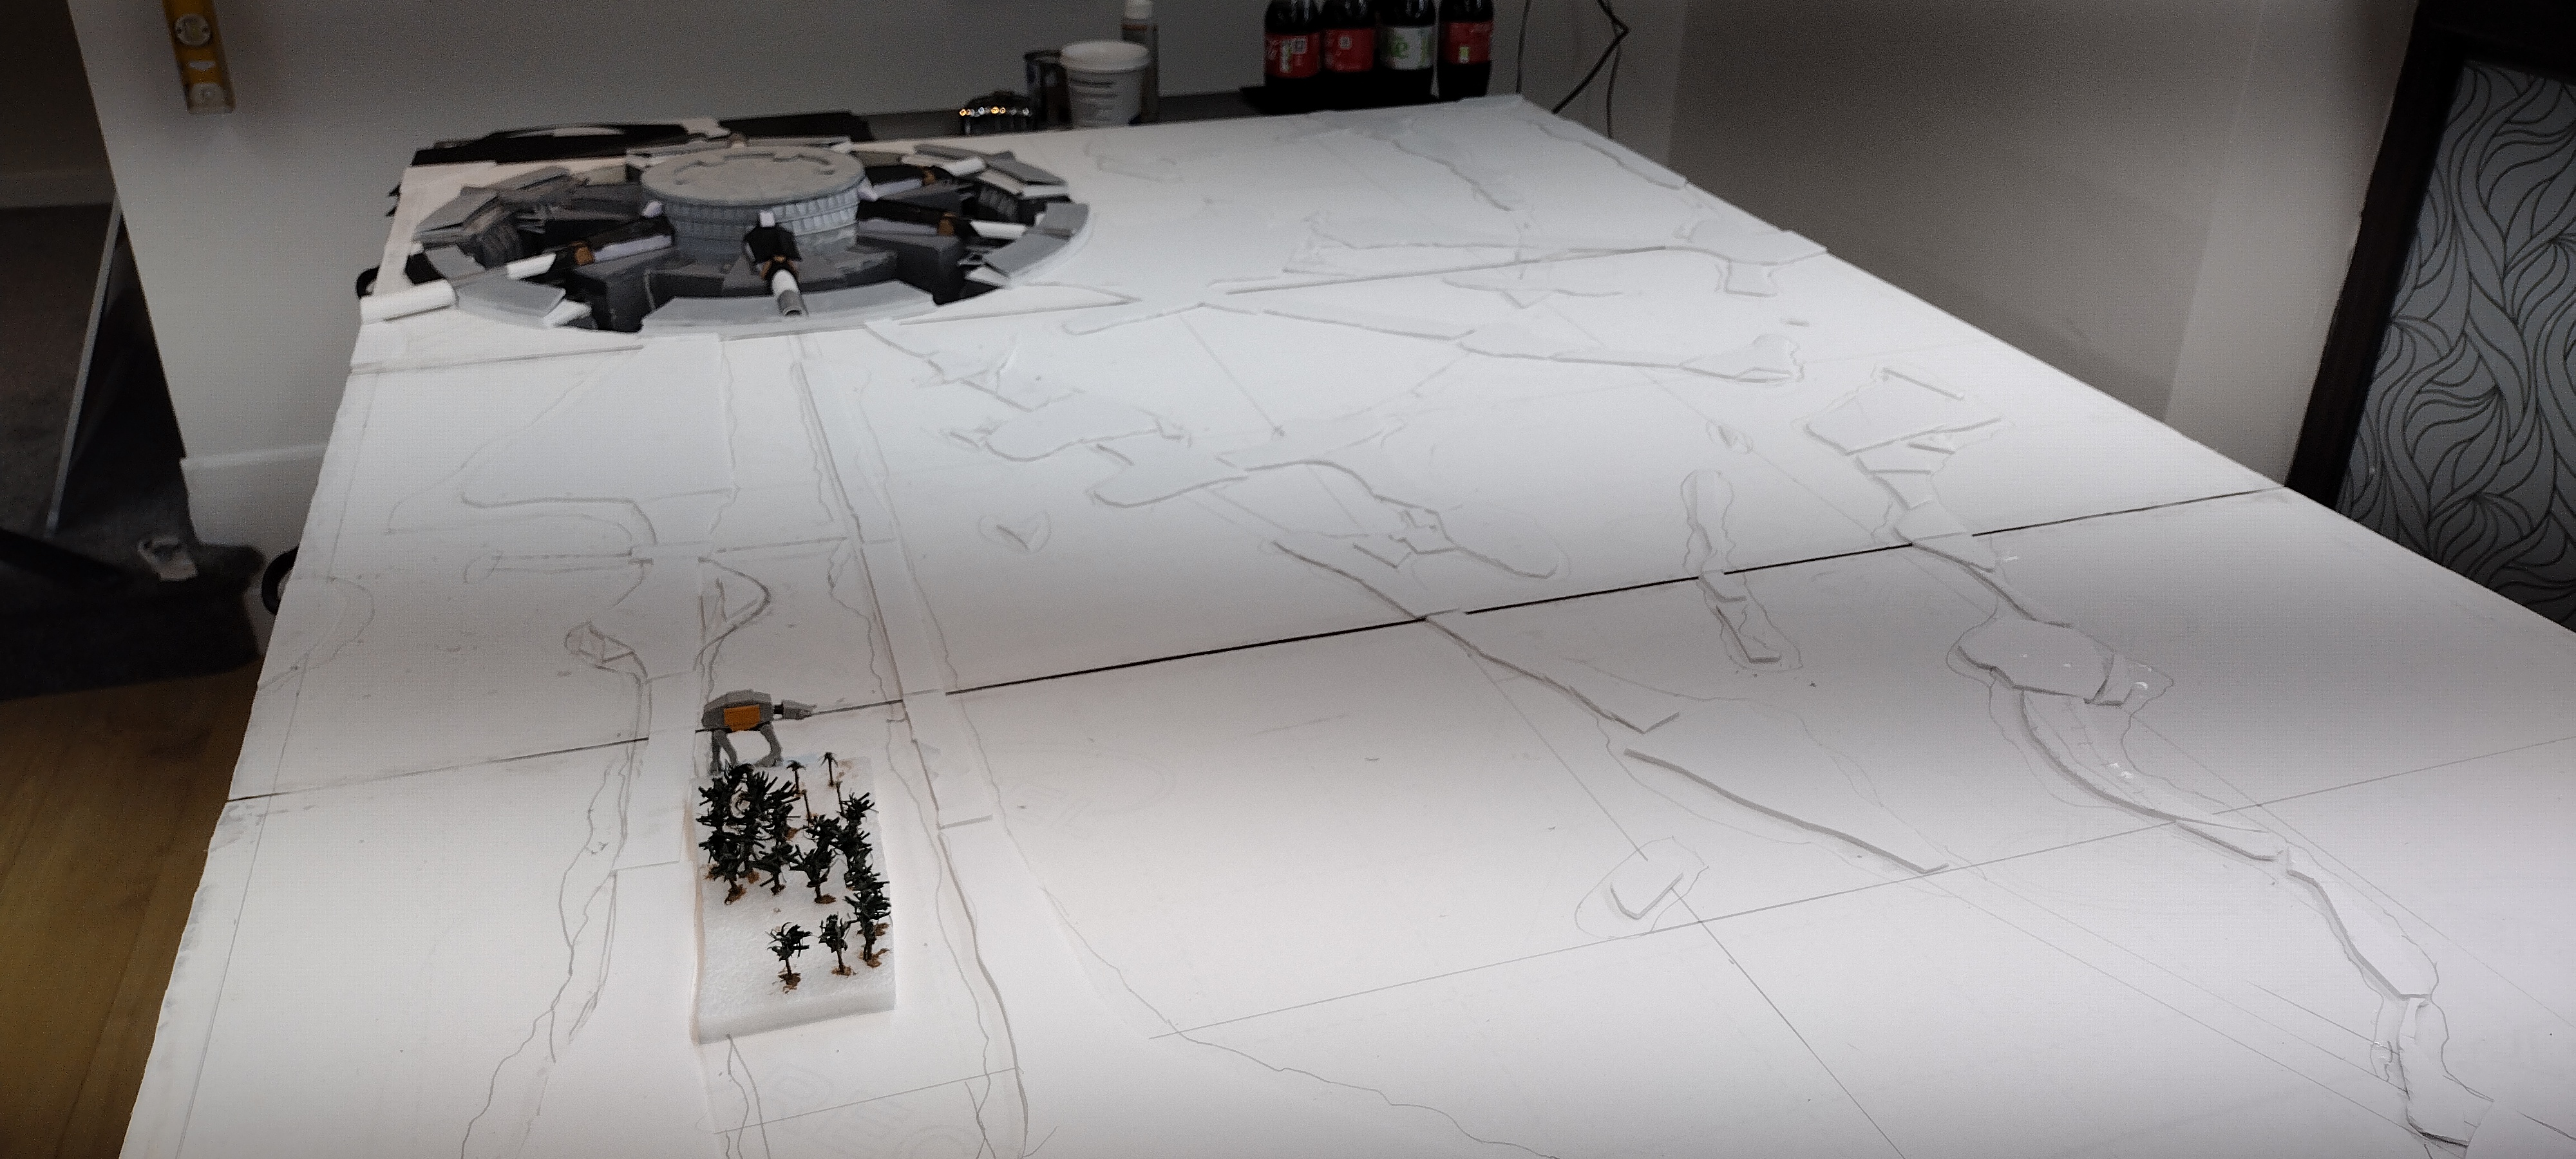
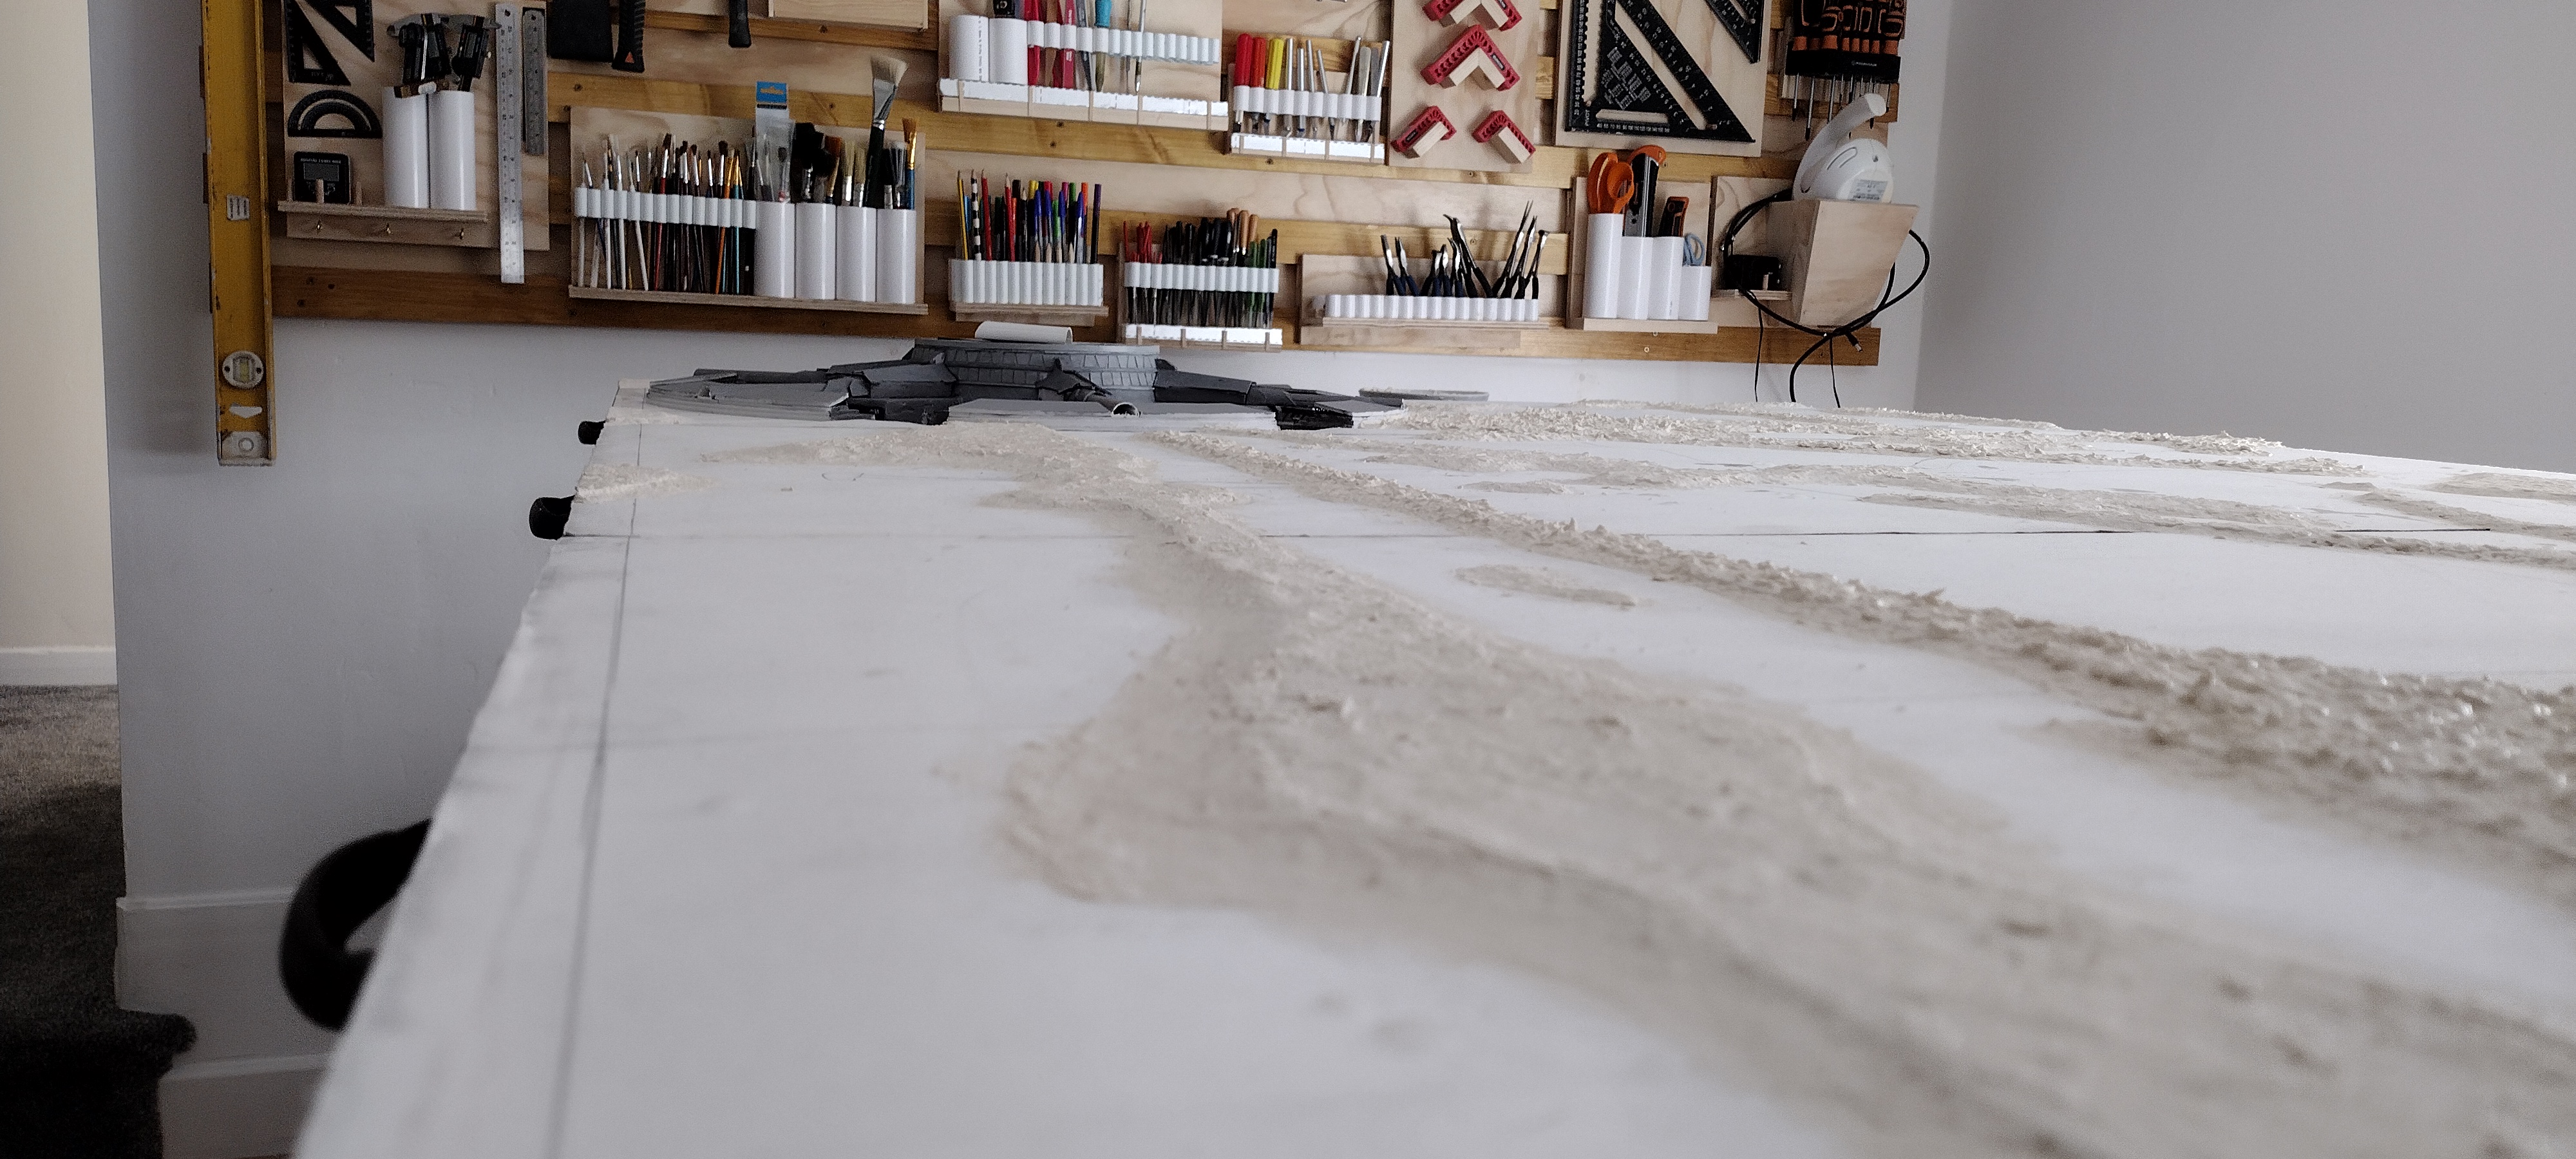
I used 3mm deep foam boards to create the islands roughly cutting it to size. I intended to use sculptamold to cover it and to create the gently sloping beaches so each piece was cut well inside the lines marked on the board.


Adding sculptamold was pretty straightforward. The movie filmed this section in the Maldives so I looked at plenty of images of fabulous beaches before settling on Leyland Trade Magnolia paint to add into the mix because it looked right and I had a huge tub of it from an earlier decoration of my house. I added the paint to the mix before application to ensure if the surface got scratched and the interior was exposed that the colour would match. All the islands are flat so I just had to create the slopes of the beach and then wait for it to dry.
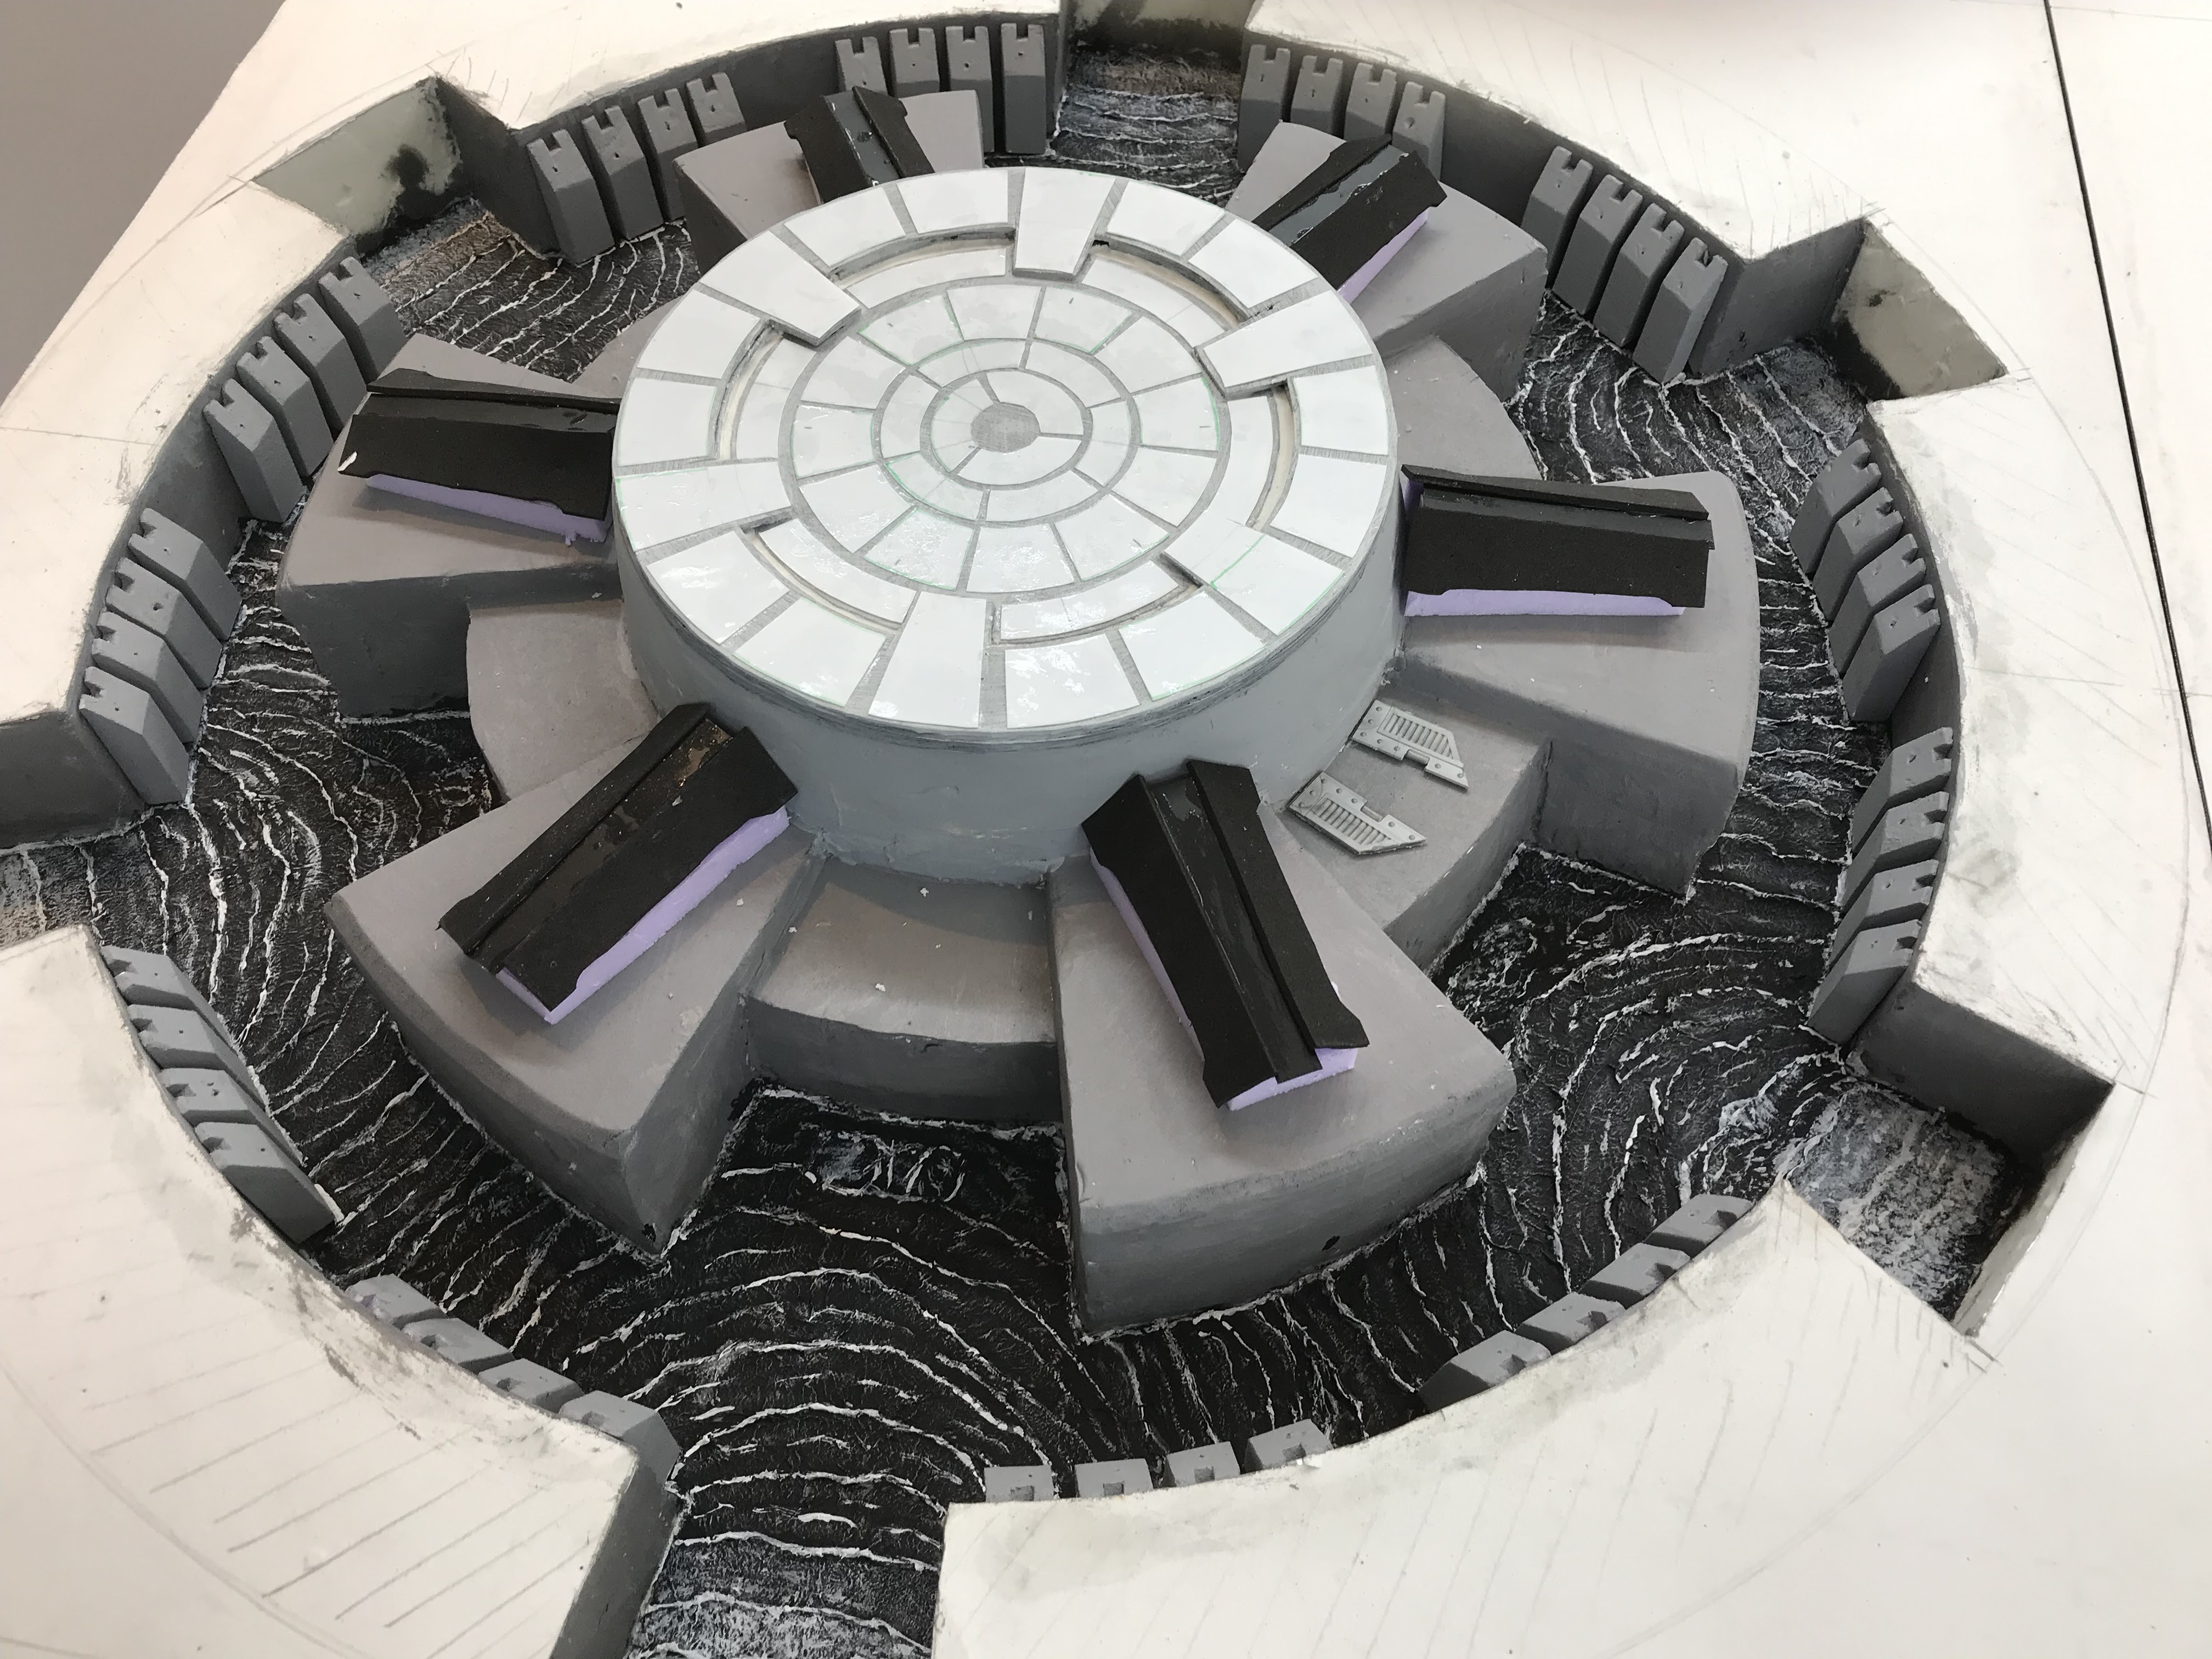
With the islands created I could now create the seas and water. The sea covers about 50% of the board and goes all the way along all the outside edges. I decided really early in the planning that a resin pour was not appropriate for this build. Scouring the internet I came across a YouTube video by Marklin of Sweden a railway modeller. He outlined a process using toilet paper and diluted PVA/ wood glue.
I tried it first for the water reservoir at the base of the tower as this allowed me to experiment where any mistakes would not be terribly visible. The process is very straightforward, simple to do, cost efficient and delivers realistic results.

Several layers of toilet tissue are placed down, a layer at a time and thoroughly covered with watered down glue. Once all the toilet paper is down and wet an old large painting brush is used to ruche it up to create waves and to remove any pattern. With the reservoir I had to account for waterfalls and cooling inflow pipes as well as the unusual shape of the reservoir. I found it was very easy to work the tissue and create waves. Any issues could be easily rectified with more toilet paper and it remained workable for hours.

Once dry I painted the reservoir black and then dry brushed white with wave tops highlighted in white.
The sea was both simpler and more complicated. Creating the waves was fairly straightforward all I really had to do was decide on the basic wind/ tide direction and then adjust slightly for the various islands. The sea shown in the movie is fairly flat and tame so I didn’t have to show much in the way of wave tops. So again toilet paper and glue was used with the same ruching process. Straightforward but time consuming. I papered over the joints in my 3 boards as I figured it would be easy to cut and would minimise visible joins when the board was completed.


I then began to create the races towards the tower weirs and waterfalls. I cut styrene strips to create the weir crenellations. I then used the toilet paper water system to simulate the water rushing towards the falls. This was fairly simple to do and the tissue easily malleable even when being pressed between the weir tops.

The complication came from creating the colouring of the sea and the blending in of the various colours. A visit to my local DIY store resulted in 4 paint taster pots with various shades of blue.

I worked in small sections about 30cm square and began by painting the sections by the beach. This was just a 1-2 cms wide strip. I then painted another strip right alongside it and then quickly painted the next colour alongside that and blended the second and third strips. This process was repeated until all four colours had been painted on. The further away the beach was the wider and bluer the colours became. The final blue was just a bit too deep a blue for me so I mixed the previous shade with it slightly to lighten it.


The process was then repeated until the whole sea had been painted. I then added some green paint in various shades and highlights in areas I judged were likely to have slower moving water to simulate underwater weeds and plants.

I then left it an entire week to dry before I put the first layer of varnish on it. I used an interior/ exterior gloss varnish. After the first coat dried I coated it with an undiluted wood glue that dried clear. This helps give the illusion of depth. Once that dried then I just applied more and more coats of varnish until my tin ran out. I think I put six coats of varnish on in total.
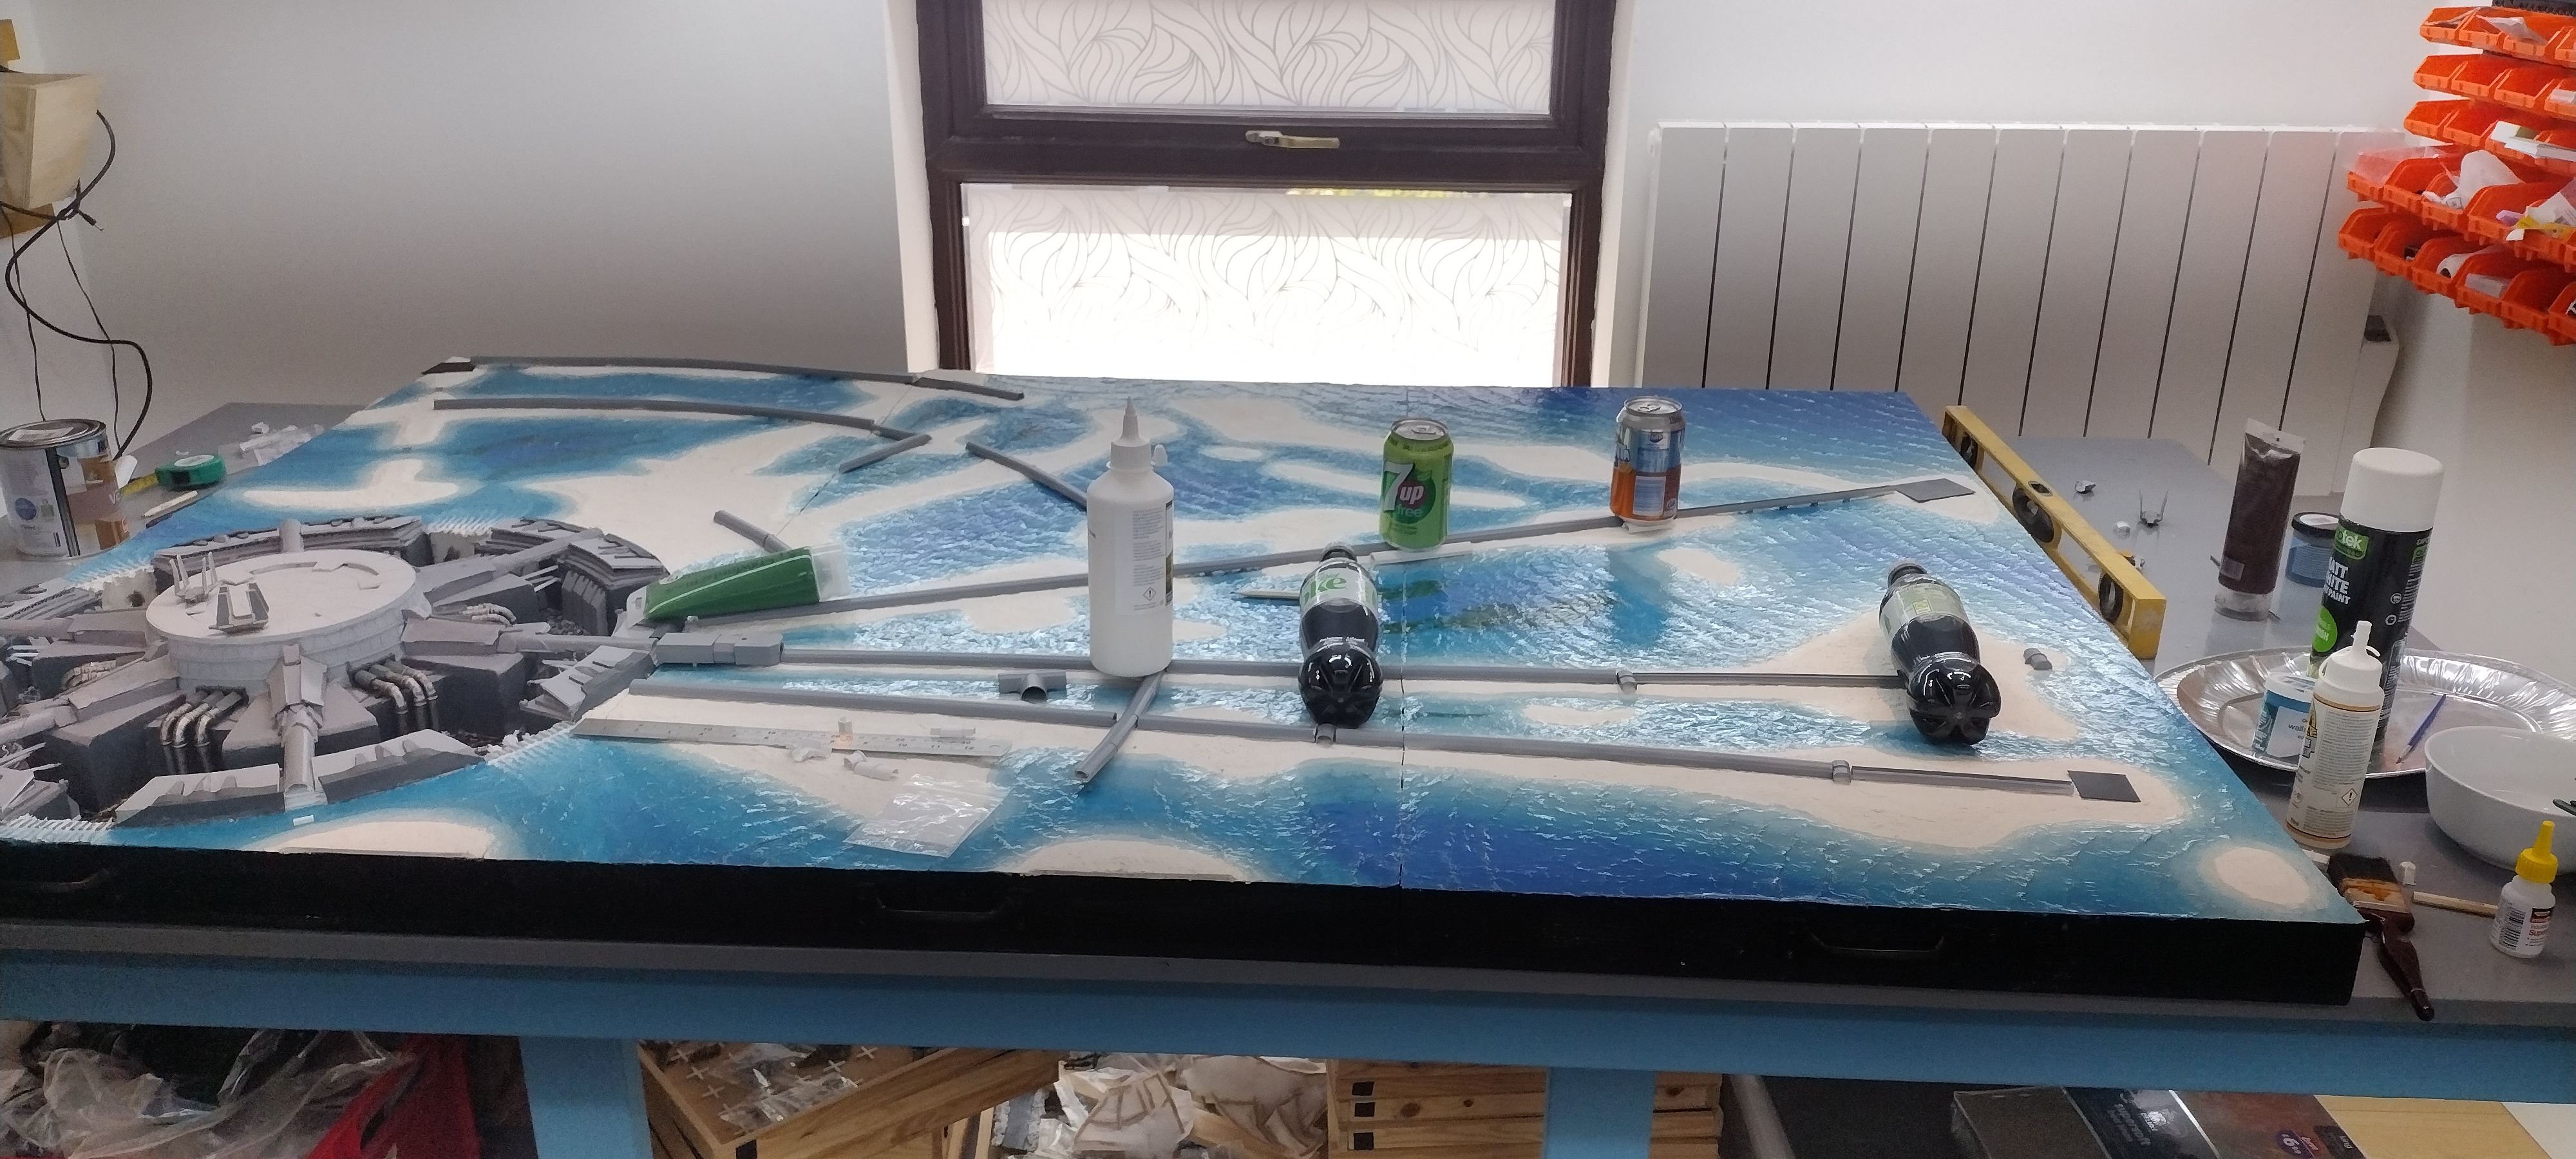
The result was a shiny blue sea of varying hues. I decided after looking at the movie and images of the Maldives that highlighting wave tops with white was not required and with that decision the sea was complete.
The addition of the six waterfalls was one of the last things I did on the board but they could easily have been added at this stage if I had wanted to. Again Marklin of Sweden was my inspiration with this really useful video.
I cut 0.25mm thick plasticard shapes that fit the vertical area behind the waterfalls. I painted the top 1cm or so with grey paint and then marked the location of the weir crenellations.

I used Liquitex acrylic medium for paint, a gloss gel that applies white but dries clear and shiny to help create the falls. I took a small amount of synthetic pillow stuffing and teased or twisted it into a thin strand. I applied a small amount of the gel to the plasticard down between a crenellation and pushed my strand into it. This lightly held the strand in place. I could then adjust the layout and spread of the fall. I made sure the fall was tighter at the top and that it spread out as it got closer to the bottom. More acrylic medium was generously added until the pillow fibres on the plasticard were covered in it. I tried to keep the fibres that hung over the bottom of the card free from the medium.

Additional strands were added in sequence until the whole of the plasticard was covered with 12 separate falls. I did not cut the strands perfectly to length at this stage but as they dried I did attempt to bend the tops and bottoms to aid placement on the model.

Once fully dry I highlighted them with white paint to pick out each individual fall. I tried diluting soft tone inkwash and adding that but I wasn’t happy with the result. I found just having the extra whiteness of the paint was perfectly sufficient for the effect I was after.

I was able to then trim the plasticard to fit each waterfall, mostly by cutting thin strips across the top. I trimmed the overspill at the bottom but kept most of it and teased it out so that it would simulate the mist generated by a large waterfall. The card was pinned in place whilst a mix of contact glue and gorilla glue dried. I filled any small gaps and painted it white and then applied the gloss gel to seamlessly join the falls to the sea on the board.
With the sea and land created I had the main elements of the board in place, next time I will look at the creation of transit system that crisscrosses the board.
Keep your dice rolling!
Charles the Modeller
